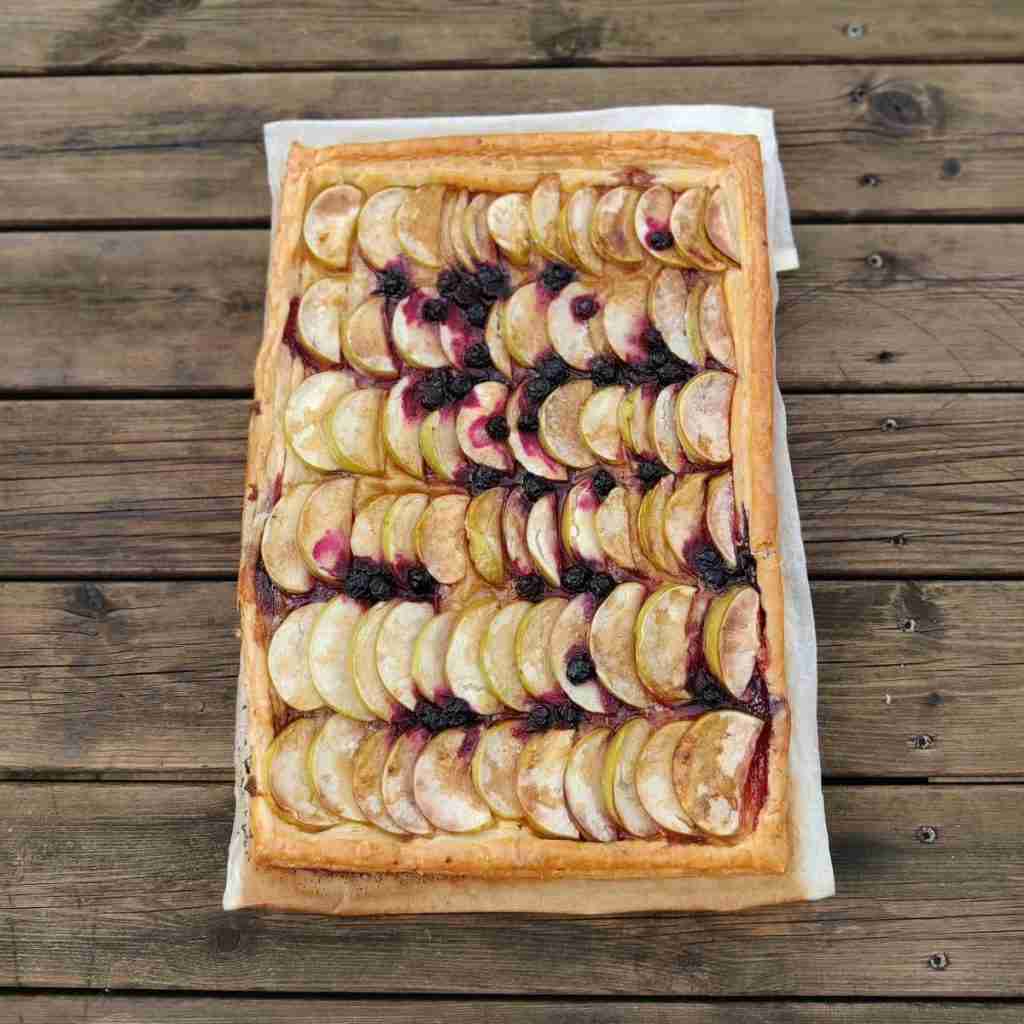
Categories
recipe

Apple tarte fine

Apple tarte fine

Image of an apple pie on a wooden table, the recipe can be found on the blog of cooking school Gourmandises Academie

Ingredients:

A roll of puff pastry

Muscovado or demerara sugar (you can use caster sugar but you won’t get that indulgent caramel flavour)

70 g salted butter

3 to 4  apples depending how big they are (you can use any type of apples for this)

A baking tray big enough to hold your pastry (lined with baking paper, I personally keep the paper the pastry comes with) 

Pre-heat your oven at 180º C

Method:

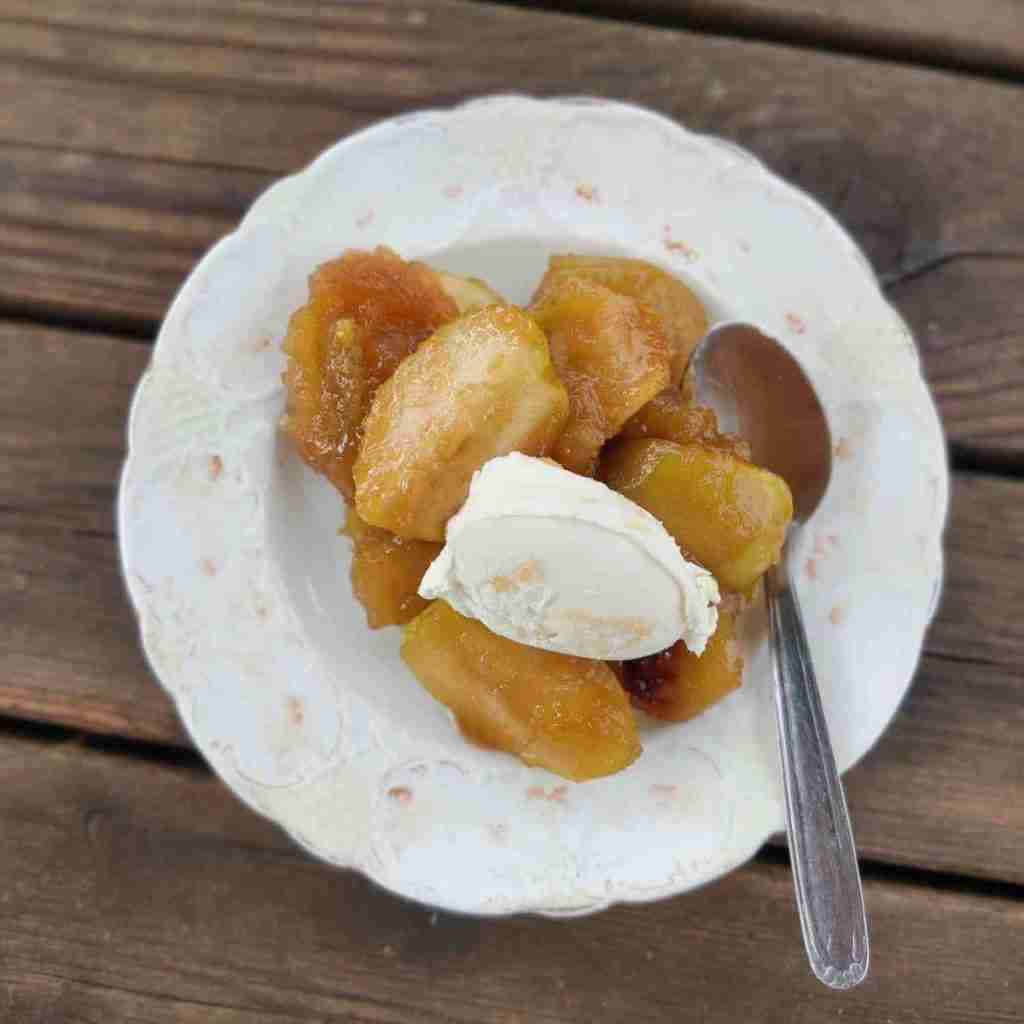
First thing first, slice your apples thinly, about 3 to 5 mm thick. Then prepare your pastry, with a knife I draw a rectangle close to the edges of my pastry to create a border. Then I lay my apples in rows until they have completely covered my puff pastry.  At that point, sprinkle your apples with a generous amount of muscovado sugar, and add nuggets of butter on top of your apples. To add a bit of colour I also added a few blueberries, you could use blackberries also at this time of year. Pop your tart in the oven, for 20 minutes or until the edges and bottom of the tart are cooked. This is a dessert that can be eaten warm or cold, the choice is yours.  

Bon appetit!

Corinne

You can watch the step by step method of this recipe on YouTube

As it is apple season, you might also want to check out my mince meat recipe

Categories
recipe

Caramelised apples served with mascarpone

Caramelised apples served with mascarpone

image with a plate containing pieces of caramelised apples with a dollop of cream, this recipe can be found on the blog of cookery school Gourmandises a Academie in Cambridge

Ingredients:


1 kg of apples, I use golden delicious, go for apples that will keep their shapes, coxes are good for this too. Cut the apples into quarters, skin on. 

100 g unsalted butter 

200 g of sugar (granulated or caster)

Mascaporne to serve it with

Water to cover the sugar

You will need to use a heavy base pan for this recipe

Method:

In a pan, add your sugar and lightly cover it with water, just enough water to absorb the sugar in your pan. Let it come to the boil and slowly turn into a caramel (it will take about 10 minutes to do so). When your caramel has turned into a nice brown colour add your butter and mix. Then add your apples and mix until all your apples are covered with the caramel. Turn the heat down and let your apples simmer in the caramel for a good 30 to 40 minutes, or until all your apples are soft and caramelised (do give them a stir every now and then). Serve warm with a good dollop of mascarpone, vanilla ice cream and clotted cream work well too. These apples will keep for a week in the fridge, you can also freeze them. I also use them in cakes and frangipane tarts.


Corinne

You can watch the step by step method of this recipe on YouTube

You might also want to check out my cherry clafoutis recipe

Categories
recipe

French summer classic: Cherry clafoutis

French summer classic: cherry clafoutis

Image with an enamel tin filled with some kind of cherry cake, recipe available on the blog of Gourmandises Academie

Ingredients:


4 eggs 

45 g unsalted butter (melted)

150 g of sugar (granulated or caster)

50 g ground almonds 

100 g of plain flour

250 ml of milk

50 ml of double cream

650 g of cherries

Not essential but highly recommended, 3 tbsp of rum

8″ baking tin (buttered) 

Pre-heat your oven at 180º C

Method:

First thing first, butter your baking tray, and place all the cherries at the bottom. Now, there is a big debate in France about clafoutis aux cerises, stones or no stones. I’m team stones in and even stork. The stone actually adds flavour to your pudding. But I shan’t decide for you and won’t be offended if you decide not to add them, although, let’s face it, it is more work!

In a bowl, quickly whisk the sugar and eggs together, then add your flour and ground almonds and whisk again. Then add your milk, cream and melted butter and give it a last mix. Pour your mixture over the cherries and pop your tray in the oven for 30 to 40 minutes, or until your clafoutis is nice and golden on top. And that is all there is to it, so simple and delicious. You can savour your clafoutis, warm or cold, with a dollop of cream or a good vanilla ice cream. 


Corinne

You can watch the step by step method of this recipe on YouTube

As it is courgettes season, you might also want to check out my chocolate courgettes cake

Categories
Uncategorized

Stuffed chillies deep fried in a rich turmeric batter

Stuffed chillies deep fried in a rich turmeric batter

Image with battered stuffed chillies, including one of them cut in half showing the filling inside, this recipe is available on the blog of cookery school Gourmandises Academie

Ingredients:

This recipe is for 4 people

4 chillies ( I’m using jalapenos, because they are quite chunky, but if you don’t want the heat, you can use a small sweet pepper, something like padron peppers or Greek peppers works well).

4 plain good quality sausages

Fresh thyme

Two spring onions

A piece of fresh ginger, about the size of a tsp, grated

250 g of plain four

2 tsp of baking powder

2 eggs

1 tsp of turmeric

A glass of water

Salt and pepper to season

Vegetable oil


Method:

Step1, the chillies

Start by taking off the sausage cases. In a bowl, add your chopped spring onions, ginger, thyme, sausage and mix well. Make an incision in your chilli peppers, be careful not to cut them in half, you want the chilli to stay whole, take off all the seeds inside. Add a bit of your sausage mix inside the chilli and set aside.

Step 2, the batter

In a bowl, add your flour, turmeric, baking powder, salt and pepper to season and mix. Then slowly add your water a little bit at a time and mix until you get a nice thick batter (similar to a pancake batter).

Step 3, the frying

Prepare a plate with kitchen paper on which your chillies will rest once fried. A deep fryer is perfect for this. I don’t have one, so I use a very deep pan or you can also use a wok. I pour enough oil to be able to deep fry my chillies. Bring your oil to a high temperature, it takes about 3 minutes. One way to find out if your oil is ready is to add a little bit of batter, if the batter floats quickly to the top, it’s ready. At that point dip your chilli into the batter, slowly add it to your hot oil (be very careful not to burn yourself), reduce the heat immediately, as you want your chilli to slowly cook and not burn, it will take a good 3 minutes to do so, until the batter is golden brown. In Reunion, we tend to serve them immediately, but you can also have them cold with a salad. And that’s it, as easy as that!

Corinne

Also check out this other recipe from Reunion Island here

Categories
Hen parties

Baking hen party at the Academie

Baking hen party at the Academie

Group of ladies outside at a hen party at the cookery school Gourmandises Academie, Cambridge

What to expect:

Hen parties at the Academie are tailored to your requirements. For this hen do, the bride was a keen baker, so a baking party was the perfect match.

Hens were welcomed with a complimentary glass of prosecco and a madeleine flavoured with orange zest and lemon and dipped in dark chocolate, it was a party after all. As the sun was shining the bubbly was served outside.

We then came back in and started some serious baking. The hens rolled their own sweet shortcrust (pâte sablée) and  baked some blueberry and raspberry frangipane. They then made their own chocolate tarts filled with a gorgeous ganache and pipped their own personalised decorations using white chocolate.

To finish in style, they also made their own fruits tarts, filled with a delicious crême pâtissière.They were able to pick fresh mint from the garden to decorate them in style. Impressive what can be done in just two hours. Each hen got to go back with a box of their own creation. So what’s not to like.

If you are looking for a similar kind of activity for your hen do, get in touch and let’s see what we can do. 

Corinne

You can also find more information about our hen parties here


Categories
recipe

Strawberry and cream, rhubarb tartelettes, my Jubilee pudding

Strawberry and cream, rhubarb tartelettes, my Jubilee pudding

image with a wooden board covered with strawberry tartelettes, topped with whipped cream, you can learn how to make them at cookery school Gourmandises Academie in Cambridge

Ingredients:

One roll of sweet shortcrust

500 g of strawberries 

300 ml double cream

3 TBSP of icing sugar

4 rhubarb sticks 

2 Tbsp of plain flour

120 g ground almonds

2 eggs

120 g of sugar (any type of sugar will work)

120 g melted butter

A muffin tray (it will give you some very dip filled tartelettes, that you would not get with a standard cupcake tray)

Cookie cutter 

Pre-heat your oven at 180º C

Method:

For the frangipane:

Mix the butter, flour, grounds almonds, sugar and eggs into a paste and set aside.

Take your pastry out of the fridge at least 15 minutes before use. Then, using your pastry cutters, cut out some circular pieces of pastry and place them in each case of your muffin tray (you’ll want those circular pieces to be a little bit bigger than your muffin  cases so there is enough space to fill them).  Prick the bottom of your pastry with a fork. Then, place some rhubarb at the bottom and add a teaspoon of frangipane on top.

Place your tray in the oven and cook for 15 to 20 minutes until your little tartelettes are golden brown on top. Take them out of the tray and let them cool down on a rack.

In the meantime, prepare your chantilly cream, by whisking your double cream, icing sugar and vanilla paste to soft peaks. Place your chantilly into a piping bag fit with a star shaped nozzle. 

When your tartelettes are cool, pipe some chantilly cream in the centre of your tartelettes, as per picture, then slice your strawberries in half and place them around the centre of the chantilly cream. Then add a bit more chantilly cream to finish them off nicely. 

Et voilà!

Enjoy them with a glass bubbly!

Corinne x

If you fancy another regal recipe how about my avocado and prawn croustade 

Categories
recipe

Asparagus Tart with creme fraiche and comte

Asparagus tart with creme fraiche and comte

image of an asparagus tart topped with melted cheese, you can learn how to make this tart on the blog of Gourmandises Academie, Cambridge

Ingredients:

One block of puff pastry 

Two bunches of asparagus 

3 TBSP of creme fraiche

100 g of comte cheese (you can also use cheddar)

Black pepper to season


Method:

Start by cutting the end of your asparagus stems as they tend to be hard.

In a pan pour a litre of water with a tbsp of salt and bring to the boil and then throw your asparagus. Leave them to cook for 3 minutes, then drain them and let them cool.

Meanwhile, pre-heat your oven to 180° C and start preparing your puff pastry. I keep the pastry on the parchment paper it comes with. Then, with a knife I draw a rectangle close to the edges of my pastry, to create a border. Spread 3 tbsp of creme fraiche and add your asparagus, season with a bit of black pepper and add the cheese on top. (At this point, you could easily add pieces of prociutto or parma ham).

Et voilà, baked in a hot oven for a good 30 minutes. Serve with a gorgeous salad.

Corinne x

You may also like to try this other gorgeous summer recipe using puff pastry, click here

Categories
recipe

Gluten free chocolate cake

Gluten free chocolate cake

Image of a slice of chocolate cake sitting on a silver serving spoon

Ingredients:

40 g cocoa powder 

70 g dark chocolate (at least 70%) 

70 g unsalted butter 

6 eggs (2 whole, and 4 separated into whites and egg yolks) 

70 g ground almonds 

200 g of caster sugar 

A pinch of salt 

8″ cake tin lined with baking paper 

Pre-heat your oven at 180º C

Method:

Melt your chocolate and butter over a bain marie. Whisk your egg yolks and 2 whole eggs with 120 g of caster sugar to a thick white consistency, then mix in your ground almonds and cocoa powder. Add this mixture to your melted chocolate and butter. Whisk your egg whites and pinch of salt with the rest of the caster sugar (30 g) to snowy peaks. Slowly fold your whites to your chocolaty mix until completely incorporated. Then pour into your cake tin and cook for 25 minutes (if the end of your knife comes clear, your cake is cooked). Yes, it is as simple as that.

Tip: when your cake is completely cool, dust the top with cocoa powder 

Corrine x

Categories
recipe

Lobster tail in a rich tomato and turmeric sauce

Lobster tail in a rich tomato and turmeric sauce

picture with lobster tails in a tomato sauce, you can learn how to make this at cookery school Gourmandises Academie in Cottenham, Cambridge

Ingredients:

2 lobster tails ( one tail per person)

2 tomatoes roughly chopped

1 finely chopped onion

2 cloves of garlic crushed

Fresh thyme

Fresh parsley

Two chillies (mild or hot depending on your taste buds)roughly chopped

1/4 tsp of turmeric

Fresh grated ginger (about the size of half a tsp)

Method:

In a pan, add a tbsp of vegetable oil (not olive oil as you want the full flavour of the lobster). Start by adding your onions and thyme, stir until the onion becomes translucent. Then add your garlic, your ginger and your chilli and stir again for a minute then add your turmeric and your tomatoes. Stir and let this lovely sauce simmer for 30 minutes (if the sauce dries out a little bit, add a little bit of hot water), then add your lobster tails and simmer for another 10 minutes, stirring after 5. That’s it, add some chopped fresh parsley before serving. In Reunion, we tend to serve it with plain Basmati rice. Delicious! Et voilà!

You can find lobster tails at Waitrose, but also The Fin Boys, or Crystal Waters Ltd on Cambridge market.

Corrine x

Categories
Christmas baking recipe

Christmassy madeleines with orange and lemon zest

Christmassy madeleines with orange and lemon zest

picture of a bowl containing loads of madeleines dipped in dark chocolate, you can learn how to make this recipe on the blog of cooking school gourmandises academie in Cambridge

Ingredients:

125 g melted unsalted butter

125 g plain flour

3 medium eggs

4 g baking powder

125 g sugar

A pinch of salt

Zest of an orange and a lemon

A madeleines tray

Method:

Sift the flour, salt and baking powder. Whisk the eggs and sugar to a white consistency and add your zest. Slowly fold in your flour. Then add your melted butter in one go and mix again. Cover your bowl with cling film and put it in the fridge for at least an hour. This will allow the flavours to develop and the mixture to rise properly. This mixture can actually be kept for a week in the fridge, so you can actually bake fresh madeleines every day. Butter and flour your madeleines tray and fill it with a tsp of your mixture. Bake them for 10 minutes or until golden brown in a pre-heated 180° C oven. Get them out of the tray as soon as they come out of the oven. You can eat them warm. Otherwise let them cool down and dip them in dark chocolate for an extra bit of indulgence. Et voilà!

Corrine x